Chapter 10 Getting Started with R & RStudio
Like any program, there is bound to be a learning curve. Personally, one of the initial barriers I face when working with a new program is navigating the graphic user interface (GUI). Given that, in this chapter we will begin with a brief orientation to the RStudio program. Subsequent sections will focus on creating and saving R scripts, creating and working with RStudio projects, and how to follow along with written tutorials like the ones presented throughout this book.
10.1 Orientation to RStudio
Rather than describe a series of screenshots, I believe one of the best ways to learn how to navigate the RStudio interface is to watch someone else. In the following video, I walk through key (but not all) features of the RStudio interface. This is one of the rare occasions in this book in which only a video tutorial is provided. Please note that in the video I walk through the Windows version of RStudio Desktop; the MacOS version may have slight differences in layout.
Link to video tutorial: https://youtu.be/cq4wixfCuhQ
10.2 Creating & Saving an R Script
An R Script is a text editor file in which you can create, edit, and save your R code for a particular task or project. An R Script file has the .R file extension. It is advisable that you type code directly into an R Script file if you wish to use the code again in the future or if you wish to save the code for another session. In general, try to avoid writing code directly into the Console using the command line if you wish to later reproduce your work. An R Script also allows you to make and save annotations (using the # symbol) to explain your code and decision making. Once you typed code (and annotations) into an R Script, you can highlight all of it (or chunks of it) and then click the Run button (or CTRL+Enter for Windows users or Command+Enter for Mac users), which is located in the upper right hand corner of the R Script editor window.
In essence, an R Script allows you to save your code and to tell a story about what you have done. As much as you believe you’ll never forget what you were doing in a particular R session, you will likely forget important details as time passes. Or, imagine a scenario in which someone else inherits your data project; a well-written and -documented R Script file will help them retrace your footsteps and onboard them onto the project.
If you prefer to follow along with screenshots when learning how to navigate a program’s interface, feel free to follow along with the written instructions for creating and saving an R script in this section. If, however, you prefer a voiceover of me walking through the interface menus in a video, then by all means follow along with the video below.
Link to video tutorial: https://youtu.be/6_CFx5-KmMI
10.2.1 Creating a New R Script
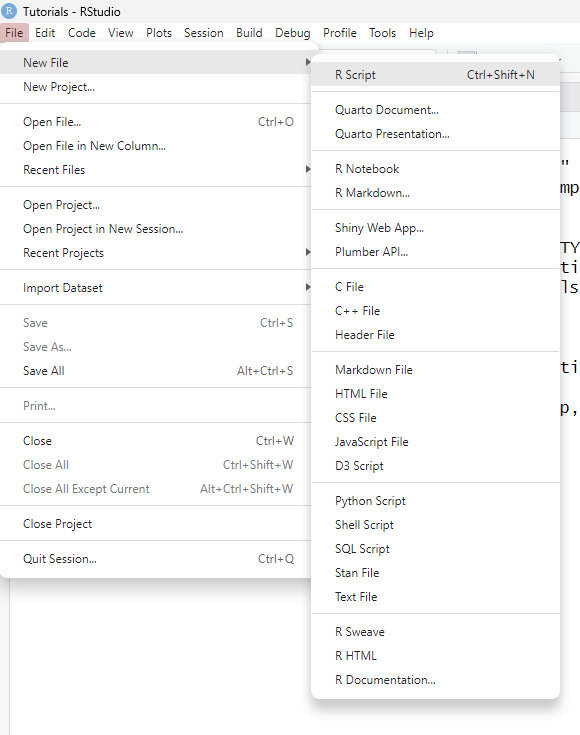
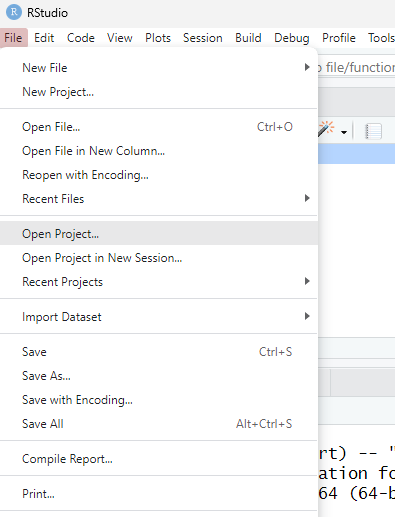
To create a new R Script in RStudio, in the drop-down menu, select File > New File > R Script (as shown below).
10.2.2 Using an R Script
To use an R Script, simply type into the script interface. To illustrate how to do this, let’s type # Adding 2 plus 3 on the first line; note that I began the line with the # symbol, which tells R that any text written to the right is annotation and thus won’t be interpreted by R when you select it and click Run. On the next line, let’s type 2 + 3. Highlight both lines of script you typed and click the Run button (or CTRL+Enter for Windows users or Command+Enter for Mac users) (as shown below).
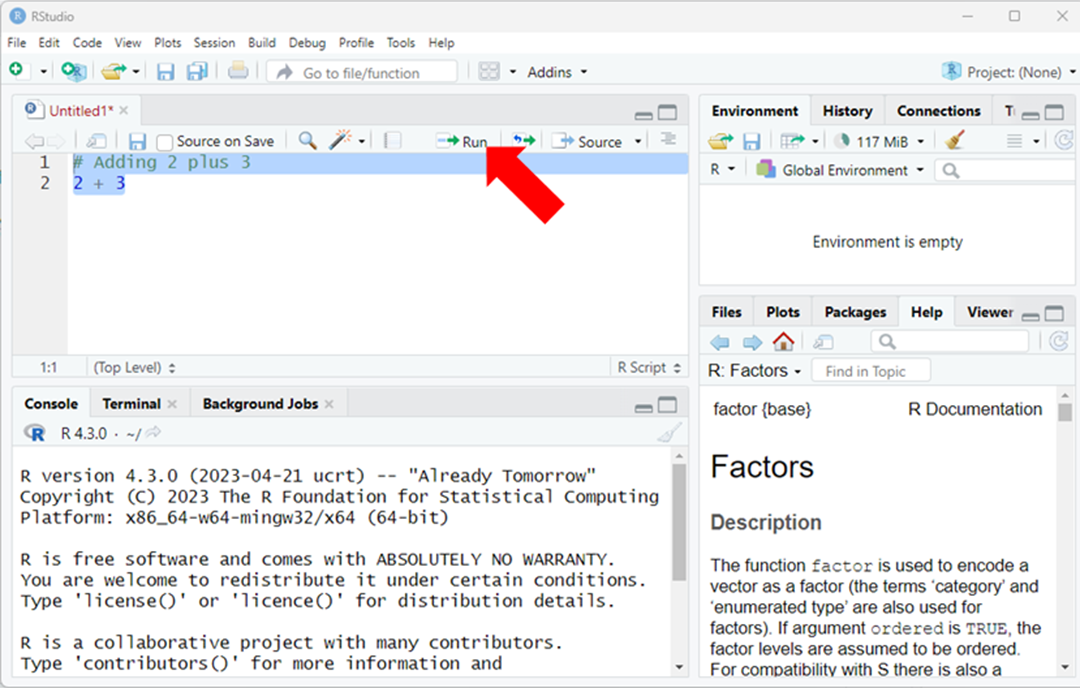
## [1] 5Your Console window should show your output (as shown above).
10.2.3 Saving an R Script
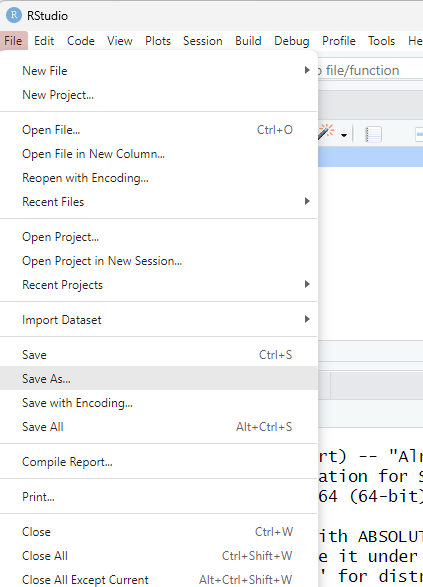
Always remember to save your R Script, and do so frequently. To save an R Script in RStudio, in the drop-down menu, select File > Save As (as shown below). After that, a window will open, and you can save the R Script file in a location of your choosing and with a name of your choosing.
10.3 Creating an RStudio Project
An RStudio project (or R project) file (.Rproj) is specific to RStudio and allows one to cluster associated scripts and data files into into a single workflow. For example, if you were evaluating a new onboarding program for your company, you could create an RStudio project with a common working directory that ties together any data files and R scripts that are relevant for evaluating the program. Creating an R project is not required for data management, analysis, and visualization work in RStudio, but it can be helpful. For more information on the value of RStudio projects, check out Wickham and Grolemund’s (2017) section on RStudio projects.
To learn how to create an RStudio project, you have the choice between following along with screenshots and written explanations or the voiceover video tutorial below.
Link to video tutorial: https://youtu.be/WyrJmJWgPiU
10.3.1 Creating a New RStudio Project
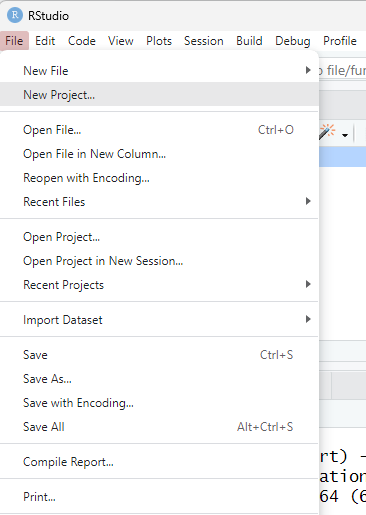
First, to create a new project in RStudio, in the drop-down menu, select File > New Project….
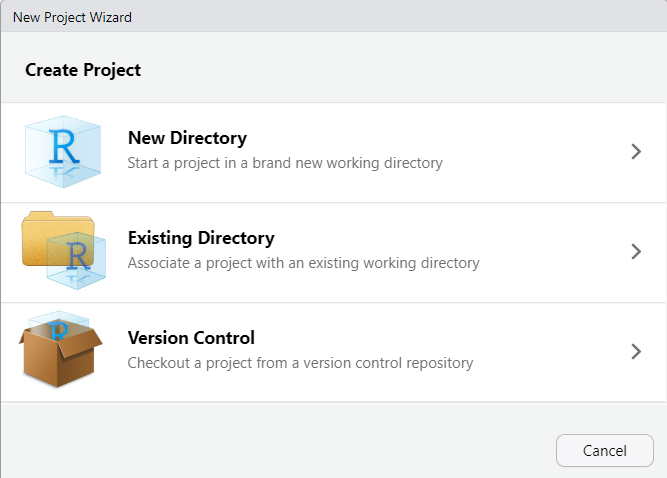
Second, when the “Create Project” window pops up, select the “New Directory” option if you have not yet created a working directory that can be used for your project (see Figure 2). [Alternatively, select the “Existing Directory” option if already have a working directory in place that can be used for your project.]
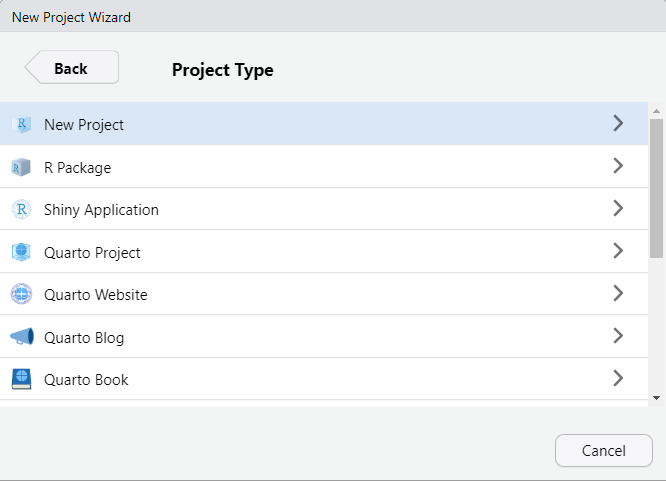
Third, in the “Project Type” window, select “New Project”.
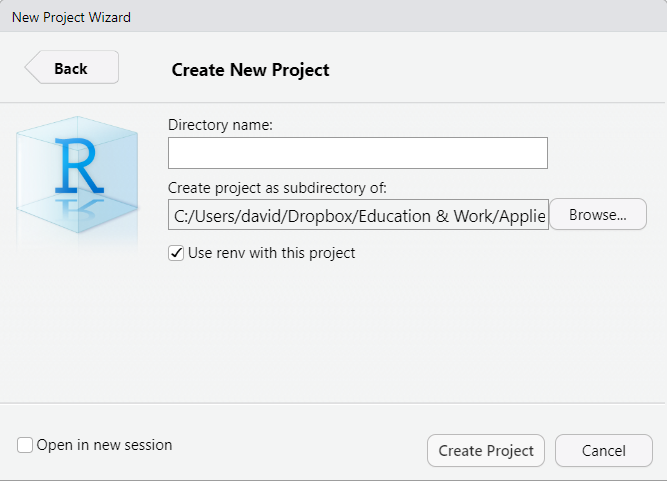
Fourth, in the “Create New Project” window, input what you would like to name the new project (in the field under “Directory name”) and select the location of your working directory. Finally, click the “Create Project” button.
10.4 Orientation to Written Tutorials
Throughout this book, I have included sample R code embedded in chapter tutorials, which I created using RMarkdown. This approach to demonstrating R tools and techniques is common, and thus it’s good to orient yourself to written tutorials in this format (which can be displayed in HTML or PDF formats). The following video provides an orientation to the in-chapter written tutorials involving R code that you will have the opportunity to follow along with in subsequent chapters.
To learn how to create an RStudio project, you have the choice between following along with screenshots and written explanations or the voiceover video tutorial below.
Link to video tutorial: https://youtu.be/1Wh6eUYAoZc
10.5 Summary
In this chapter, you learned how to set a working directory, create an R script, create an RStudio project, and orient yourself to written R tutorials. First, setting the working directory is often an important step when reading (importing) and writing (exporting objects) in R. You can use the getwd function to check where your current working directory is, whereas the setwd can be used to set a new working directory. Second, writing and saving your R code in an R Script file (.R) is an important step towards reproducible data management, analysis, and visualization. Third, creating an RStudio project can streamline data-analytic projects and provides some user-friendly features. Finally, written R tutorials are commonly presented in either printed (PDF) and web-based (HTML) formats, and thus it’s worthwhile to familiarize yourself with how to follow along with these tutorial formats.